The OCP database is not included in the free version of OCP. The free version syncs data in real-time without using the OCP database, letting you access public apps and data syncs.
Contact your Customer Success Manager if you have any questions.
Before you import data into OCP, you must create the necessary data schema to support the data you want to import. Importing data through an app installation is the only method that does not require you to manage the data schema yourself (the app handles that for you).
You can manage your OCP database schema (objects, fields, and relationships) on the Objects & Fields page or through the OCP API.
After you create the necessary objects and fields to support your data import, you can import the corresponding data.
Manage data schema using the Objects & Fields page
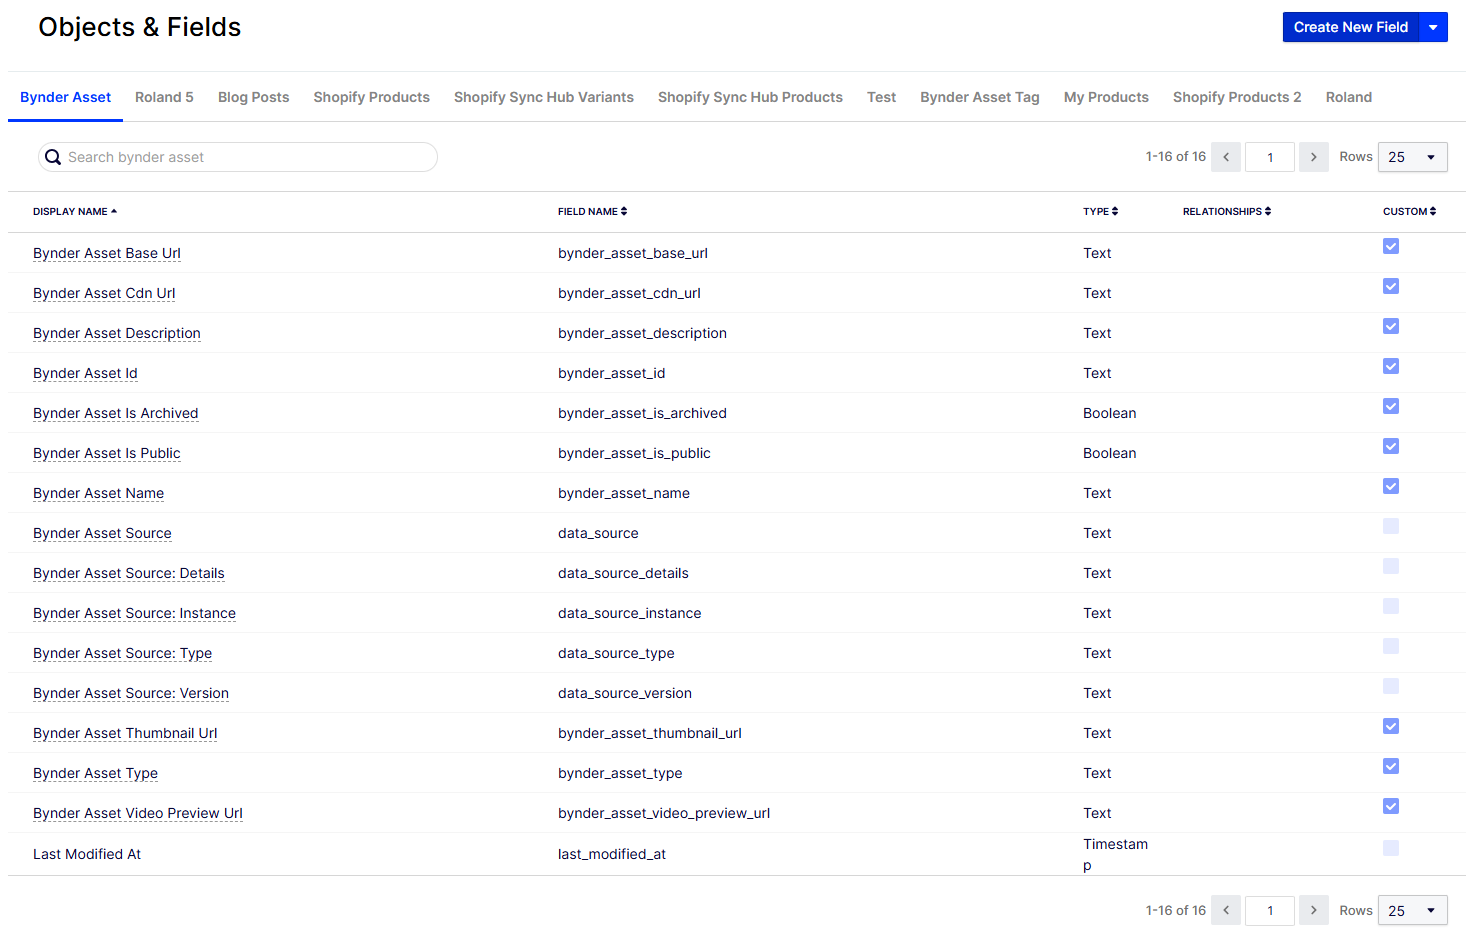
You can view and manage the schema of your OCP database on the Data Setup > Objects & Fields page in the OCP user interface (UI). The tabs on this page represent the objects (database tables) in your OCP database. You can select an object (database table) and view the fields (database columns) contained within it.
To create custom objects and fields in the UI, complete the following:
- Go to Data Setup > Objects & Fields.
-
Expand Create New Field and select Object to create an object (database table).

- Complete the following:
- Object Display Name – Enter the display name for the object that is used throughout the OCP UI. This name can include spaces. For example, Custom Categories.
- Object Name – Enter a name for the object that is used in the database and API. You must use underscores between words in place of spaces. For example, custom_categories.
- Primary Key Display Name – Enter a display name for the object's primary key, which represents an instance of the object. This name can include spaces. For example, Category ID.
- Primary Key Name – Enter a name for the object's primary key that is used in the database and API. You must use underscores between words in place of spaces. For example, category_id.
- Select Primary Key Type – Select Number or Text. This is the data type for the primary key.
- Click Save.
- Go to Data Setup > Objects & Fields.
- Click Create New Field to create a field (column) in your custom object (database table).
- Complete the following:
- Object Containing New Field – Select the custom object where you want to store this field.
- Field Display Name – Enter the display name for the field that is used throughout the OCP UI. This name can include spaces. For example, Category Name.
- Field Name – Enter a name for the field that is used in the database and API. You must use underscores between words in place of spaces. For example, category_name.
-
Field Type – Select the data type for the field.
-
Number – A number represented in standard decimal format (like
0,3.14159,-2.3,-0.112). - Text – Any printable UTF-8 encoded character, including space. Text is limited to 1024 characters.
-
True/False – Must be one of
0,1,true, orfalse. -
Date & Time (timestamp) – Must be formatted as ISO 8601 format or UNIX epoch (seconds since January 1, 1970). For example,
1435708800,2015-07-01T00:00:00-00:00,2015-07-01T12:30:00-07:00.If time and time zone are not provided, the time is assumed to be 12 a.m. UTC.
-
Number – A number represented in standard decimal format (like
- Field Description – (Optional) Enter a description for the field.
- Click Save.
- Repeat these steps until you have the correct objects (data tables) and fields (database table columns) to support your data import.
Manage data schema using the API
You can also manage your data schema using the following endpoints. See how to make API requests.
- Update object – Update an existing object in your OCP database. This endpoint lets you upload data to your OCP database, so you must first use the other endpoints to create the necessary database schema to support your data import.
- Create object – Create an object in OCP. Define its fields and how it relates to other objects. This endpoint only affects the database schema and does not let you upload data within that schema.
- List objects – List the details of all objects in your OCP account.
- Get object – List the details of a specific object in your OCP account.
- Create field – Create a field on an object in your OCP database. This endpoint only affects the database schema and does not let you upload data within that schema.
- List fields – List the details of all fields for a specific object in your OCP database.
- Get field – List the details of a single field for a specific object in your OCP database.
- Create relationship – Create a relationship between objects in OCP. This endpoint only affects the database schema and does not let you upload data within that schema.
- List relations – List the details of all relationships of a specific object in OCP.
- Get relation – List the details of a single relationship of a specific object in OCP.
Custom objects and fields example
For example, you might want to import the following customer service ticket data:
| ticket_agent | satisfaction_rating | customer_bucket | topic_category | ticket_id | customer_email |
|---|---|---|---|---|---|
Alex |
5 |
VIP |
password reset |
123456 |
customer@gmail.com |
Before you can import this data, you need to create the following object (data table) and fields (data table columns) to hold that data:
-
Object –
tickets -
Fields
ticket_agentsatisfaction_ratingcustomer_buckettopic_categoryticket_idcustomer_email
After you create the necessary objects and fields to support your data import, you can import the corresponding data.
Article is closed for comments.