This is an example how to create a Merchandising campaign to show recommendations from a specific category, based on the category of the product currently being viewed. If you are not yet familiar with the Merchandising tool, please read this article.
We will apply the following rule: On product pages, if a user is viewing a product from the category "Books", then recommend other products from the category "Books".
Log in the Personalization Portal
Click "Merchandising" followed by "Create a new campaign"

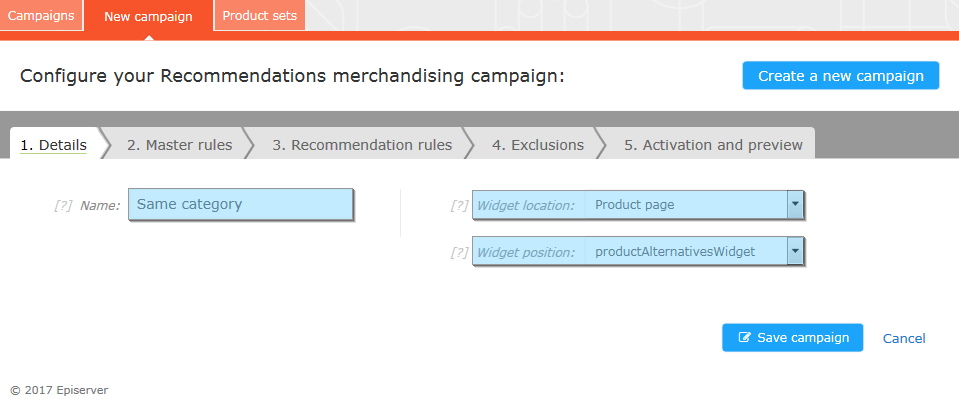
1. Details page
Name - the name will appear on the Campaigns overview screen; use a name which will help you remember what the campaign achieves
Widget location - this is the page type where the target widget of the rule is located, e.g. Home, Product, Basket etc.
Widget position - this is the specific widget that the rule will apply to
Go to next step 2. Master rules.
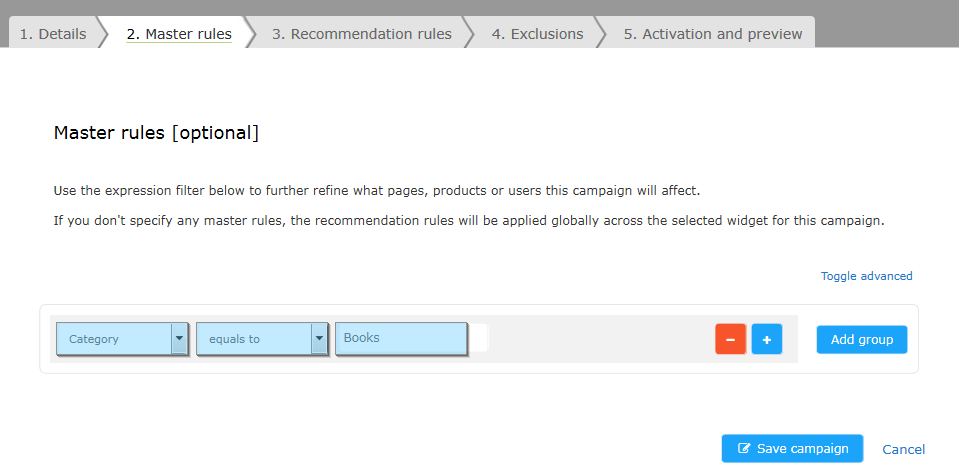
2. Master rules page
Master rules are optional. You can use this feature to further refine what pages, products or users this campaign will affect.
For example, if this rule is to apply to ALL products (e.g. the recommendations on every product page should display products from the selected category), then no master rule is needed and you can skip to the next step.
In this example, we want to recommend only Books when viewing a product from the Books category. We will apply the following rule:
Category - this is what you are basing the rule on; for every product viewed on the site, the system is checking if the product belongs to the category specified in the master rule - only if it does, then the recommendation rules will be applied
Equals to - is a command to match the category to a specific value
Books - is the category that products need to belong to in order for the recommendation rules to be applied
Go to next step 3. Recommendation rules.
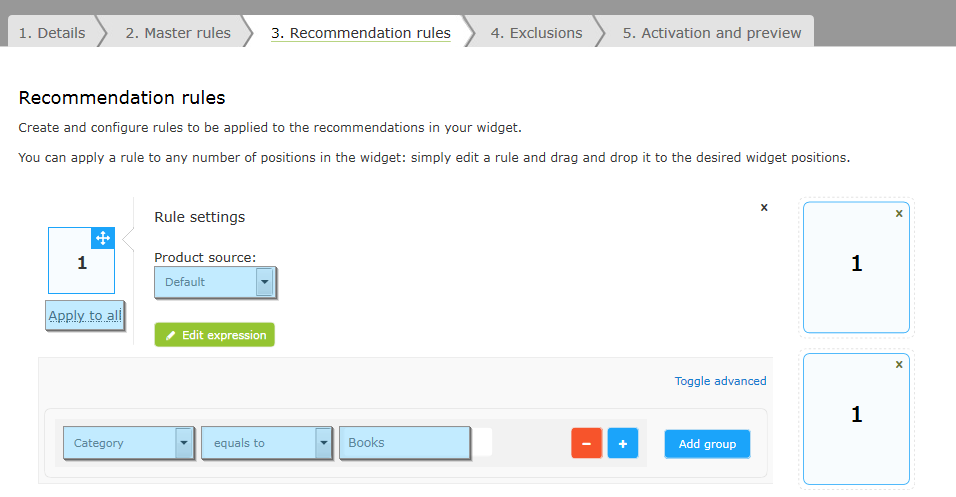
3. Recommendations rules page
Click the "Edit expression" button to start configuring the rule that will apply to recommendations in the selected widget.
This is the expression that we will add:
Category - this is the product attribute that will be checked for each recommendation to evaluate if it matches the rule
Equals to - is a command to match the attribute value exactly
Books - is the category that products need to belong to in order to be recommended on a page
Product source = default (uses the existing personalization strategies configured in the widget to generate the recommendations)
To select which positions in the target widget the rule applies to, you can drag and drop it to the available slots on the right-hand side. Or click on "Apply to all" to add the rule to all positions in the widget.
Once the above is set up, we can save the campaign and activate. The 4. Exclusions and 5. Activation and preview tabs are optional and we don't require them for this example campaign.
Activating the Rule
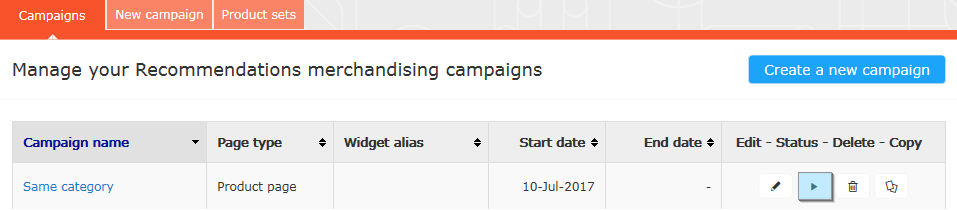
Once the campaign is saved, it will appear in the list in the Campaigns overview screen.
To put the campaign live on the site, click the "Play" button next to it. The button will change to a "Pause" symbol. Click on it to deactivate / pause the campaign. These changes take effect on the site immediately.
Please sign in to leave a comment.