Opti ID lets you configure Security Assertion Markup Language (SAML) single sign-on (SSO) with Entra ID as the identity provider (IdP). With this setup, Entra ID authenticates and authorizes your users.
You should set up SSO for existing users within your organization before inviting new users. After you set up SSO with Opti ID, new and existing users must log in to Opti ID using credentials for the SSO provider going forward. This includes the technical contact who originally set up Opti ID for your organization.
Configure the SSO connection
- Go to Settings in the Entra ID portal and switch to the tenant you want to register as the SSO application for Opti ID.
- Search for and select Microsoft Entra ID.
- Go to Enterprise Applications > All Applications.
- Select New application.
- Select Single sign-on in the Manage section to open the SSO panel for editing.
- Select SAML to open the SSO configuration page. After the application is configured, users can sign into it using their Entra ID tenant credentials.
-
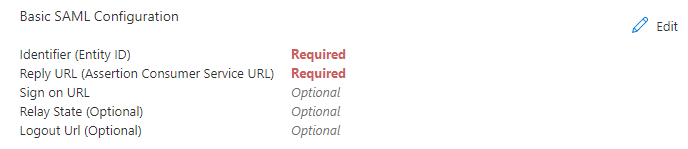
Click Edit in the Basic SAML Configuration section on the Set up single sign-on panel to configure SSO in Entra ID.
These are placeholder values until you obtain the final values from Optimizely, and you can edit them later.-
Identifier – Enter a valid placeholder URL, like
https://www.sample1.com, which you will replace later. -
Reply URL (Assertion Consumer Service URL) – Enter a valid placeholder URI, like
https://www.sample2.com, which you will replace later. -
Click Save.
-
Identifier – Enter a valid placeholder URL, like
- Click Edit in the Attributes & Claims section and go to Additional claims. Update email, firstName, and lastName (case-sensitive) as shown in the following images.
- Delete any existing claims.
- Add the following claims (case-sensitive) in the following images.
-
For email – You can use user.mail
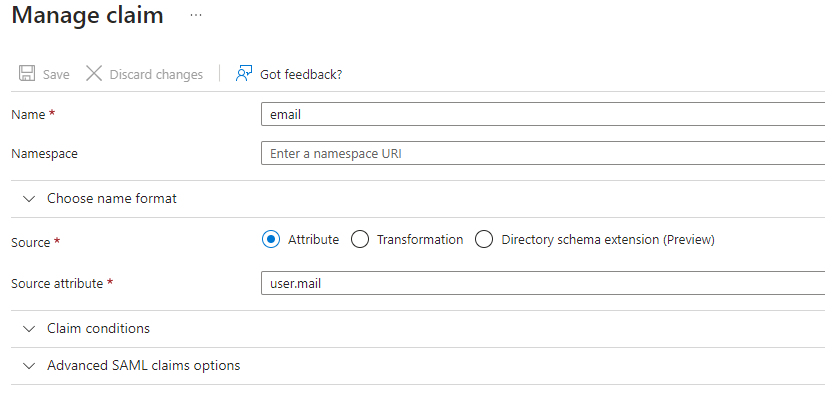
or a User Principal Name (UPN) field with user.userprincipalname.
The UPN must be a valid email format.
- Good – user@company.com
- Bad – user1-company.com
The UPN email should be able to receive email messages. Opti ID may attempt to send an email to a user based on certain activities (such as user being invited to a new user group).
-
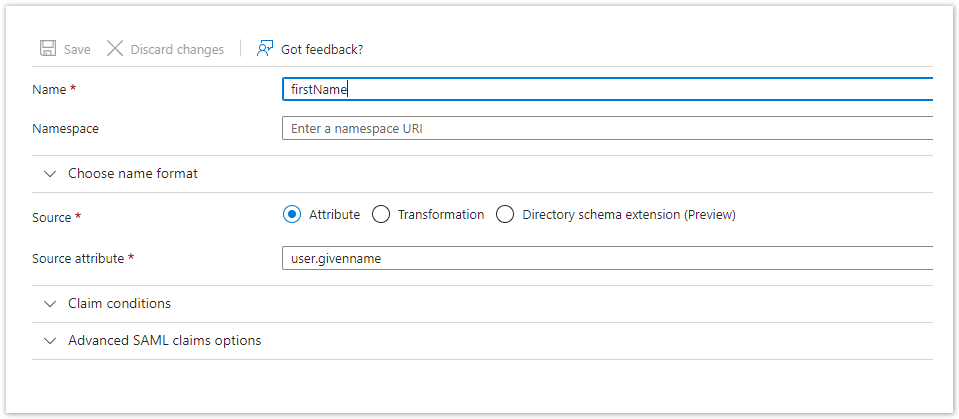
For firstName
-
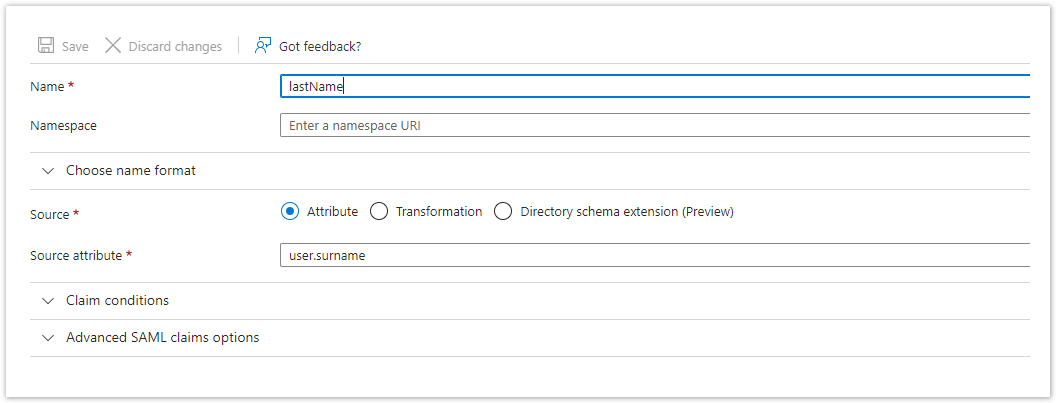
For lastName
-
The image below is an example of how the attributes and claims should look after configuring as specified.
-
-
Click Edit beside the Token signing certificate to view the SAML Signing Certificate details.
-
Ensure that Signing Option has Sign SAML response and assertion selected and Signing Algorithm is set to SHA-256.
-
Click Download for Certificate (Base64) in the SAML Certificates section to download and save the SAML signing certificate for later use.
-
Copy the Login URL in the Set up Single Sign-On App and Microsoft Entra Identifier and save for later use.
- Assign the SAML application (created in the previous section) to at least one Entra ID user group or test users. Without an assignment, no one can log in once SSO is enforced. The above step ensures you are not locked out if you experience any issues with your SSO setup. If you do not complete this step, an error displays when a user tries to sign in from the SSO connection setup below. See Troubleshoot sign-in.
- Go to
https://login.optimizely.comand log in using your technical contact email and password you set up. For information about properly activating the technical contact user, see Technical contact login. - Click Admin Center.
- Go to Settings > SSO > Add SSO Connection, select SAML as the connection type, and complete the following fields:
- Connection Name – Enter a name for this SSO connection to display when users log in. This helps you distinguish between multiple SSO connections.
- Issuer URL/Entity ID – Enter the Microsoft Entra Identifier from step 12.
- SSO URL – Enter the Login URL from step 12.
-
Signature Certificate – Select the certificate that you downloaded in step 11 from your local file system.
Make sure you enter the correct values in the correct fields because otherwise, the configuration may be accepted, but users will not be able to log in successfully.
- Click Save.
-
Copy the two values in the SSO Connection Details section and save them for later use. These values replace the Identifier and Reply URL (Assertion Consumer Service URL) placeholder values provided in step 7.
-
Click Edit in the Basic SAML Configuration section on the Set up single sign-on panel. Use the generated Audience URL and Assertion Consumer Service URL values from step 18 to update the following values in the SAML application created in your organization (set in step 7 with placeholder values).
- Identifier (Entity ID) – Paste the value from the Audience URL.
- Reply Url (Assertion Consumer Service URL) – Paste the value from the Assertion Consumer Service UR
- Click Save. The setup is complete.
IdP-initiated login
Configuring your SSO connection automatically enables IdP-initiated login, which lets users who are already logged in with your organization's SSO provider navigate to Opti ID without the need to log in again.
Test the SSO connection
One of the users you assigned in the SAML application should test the setup. They need to be a user in the Opti ID Admin Center but logged out.
- Open an incognito window and go to https://login.optimizely.com.
- When you enter your email and click Next, it should redirect you to your organization's IdP.
- Double-check your settings if there are any issues with signing in with your incognito window.
If it does not work correctly, see the Opti ID troubleshooting articles. If you cannot resolve the issue, contact Optimizely Support.
Assign users to the enterprise application
By default, new enterprise applications in Microsoft Entra ID require users or groups to be explicitly assigned. If a user is not assigned to the Optimizely enterprise application, SSO login fails, even if the SAML configuration is correct.
Follow these steps to resolve this:
- Go to Enterprise applications in the Microsoft Entra admin center.
- Select the Optimizely enterprise application.
- Open Users and groups.
- Assign the required users or groups.
Please sign in to leave a comment.