The prerequisites for Solr are often missed. Here are the steps to add the necessary roles and features.
Additional Requirements
In addition to these items, make sure to install the correct version of Java.
Server 2016 Roles and Features
- Open Server Manager
- Move through the dialogues to get to Server Roles.
- Navigate to Web Server(IIS) > Web Server > Application Development.
- Check the following, .net extensibility 4.6 and ASP.NET 4.6.
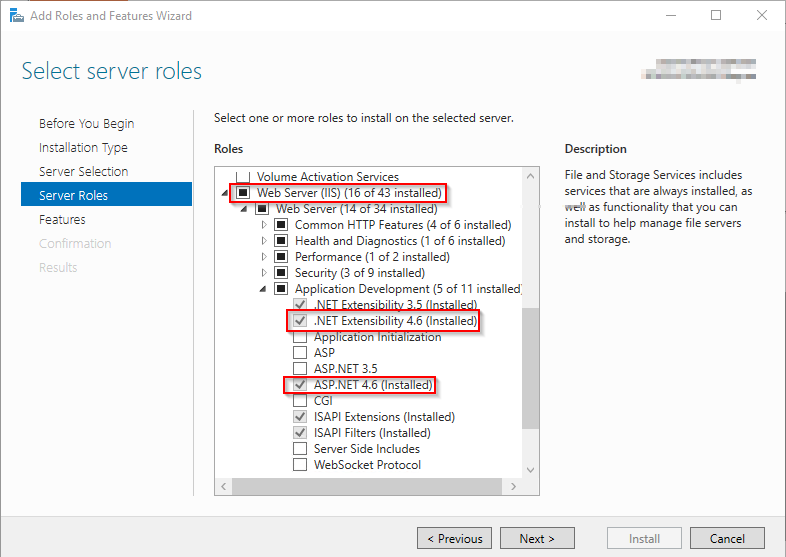
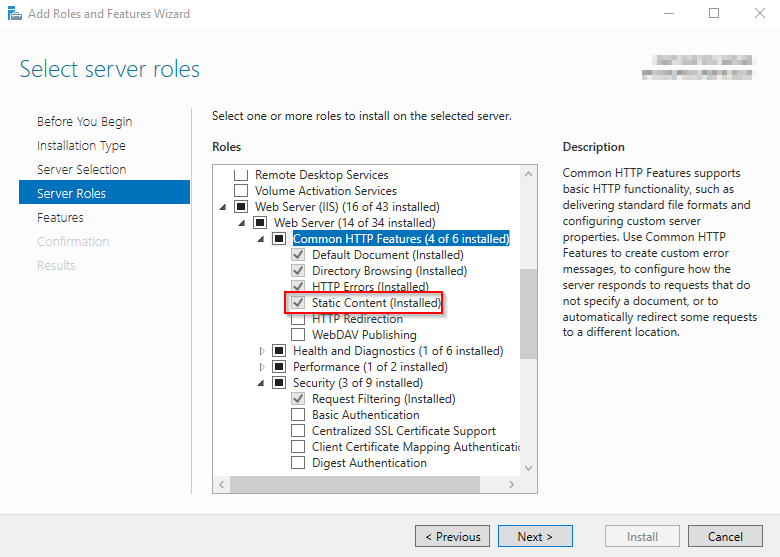
- Go to Web Server(IIS) > Web Server > Common HTTP Features
- Check Static Content
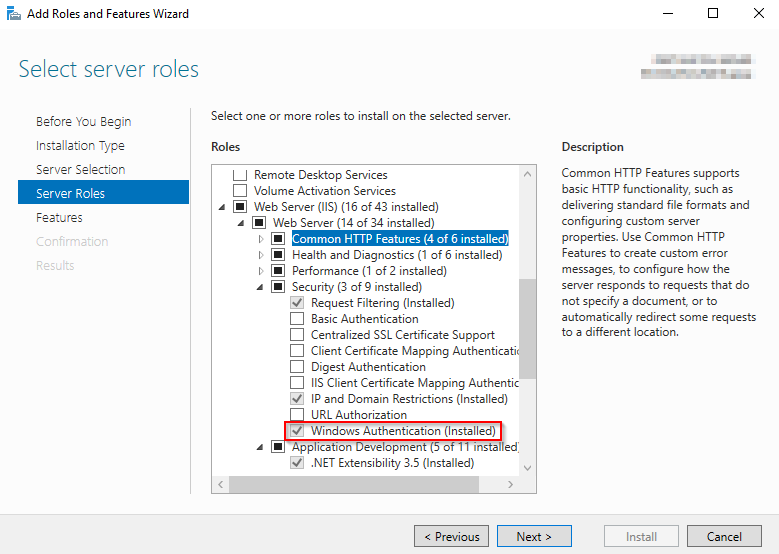
- Go to Web Server(IIS) > Web Server > Security.
- Check Windows Authentication
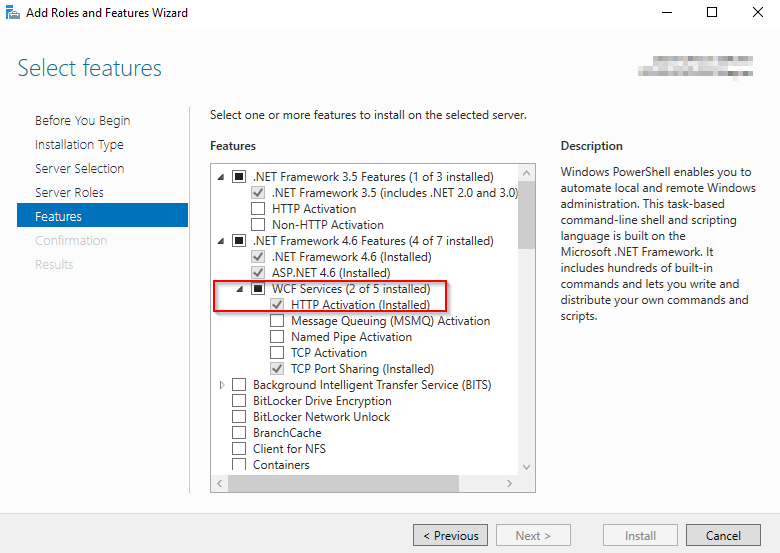
- Move to the Features section.
- Click WCF Services > HTTP Activation.
- Install
Here are the exact steps to install the needed roles and features in Server 2012 R2(the steps should be very similar in Server 2008r2).
- Open Server Manager on the Solr machine.
- Click Add roles and features.
- Click Next > until you get to Server Roles.
- Click the Application Server checkbox.
- Click the Web Server (IIS) role.
- In the resulting screen click Add Features.
- Click Next to advance to Features.
- Check ASP.Net 4.5.
- In WCF Services check HTTP Activation.
- Click Next to advance into Application Server Role Services.
- Click the checkbox for Web Server (IIS) Support.
- Click Add Features.
- Under Windows Process Activation Service Support, check HTTP Activation.
- Click the check box next for .Net Extensibility 4.5.
- Click Next twice to advance into Web Server Role (IIS) Role Services.
- Under Common HTTP Features, make certain Static Content is checked.
- Click Next and then Install on the next screen.
Please sign in to leave a comment.